# Update From Previous Versions

If you already have a previously-installed VirtualMetric version, there are several things you have to consider before updating to the current one. See the [Hardware Requirements](https://docs.virtualmetric.com/install-a-virtualmetric-server#hardware-requirements) and [Software Requirements](https://docs.virtualmetric.com/install-a-virtualmetric-server#software-requirements) sections for details.

{% hint style="warning" %}
We recommend that you always keep a proper backup of your *VirtualMetric Database* before performing the update.
{% endhint %}

## Running The Wizard

If you are running *VirtualMetric* **version 1.1** or later, you can simply install the latest update on top of the previous one.

1\. Run the installation package that you have downloaded by double clicking it. The wizard will guide you through the process.

2\. You will first see the following prompt.

<div align="center"><figure><img src="https://3741708824-files.gitbook.io/~/files/v0/b/gitbook-x-prod.appspot.com/o/spaces%2FbhbshAPk7P4wdrLxisUn%2Fuploads%2FypeClLkKEUSYpTDLxZbS%2Fimage.png?alt=media&#x26;token=00e7befd-1175-4b37-866a-f857c59327a0" alt=""><figcaption></figcaption></figure></div>

Confirm the question regarding the Windows **User Account Control** with **Yes** to allow the program to install.

3\. You will see the *Welcome Screen*.

<div align="center"><figure><img src="https://3741708824-files.gitbook.io/~/files/v0/b/gitbook-x-prod.appspot.com/o/spaces%2FbhbshAPk7P4wdrLxisUn%2Fuploads%2Fgit-blob-9bac79df45c75edf5ba13e976d007dd5b77400b9%2FSetupWizard-Update-1.png?alt=media" alt=""><figcaption></figcaption></figure></div>

Click **Next** to continue.

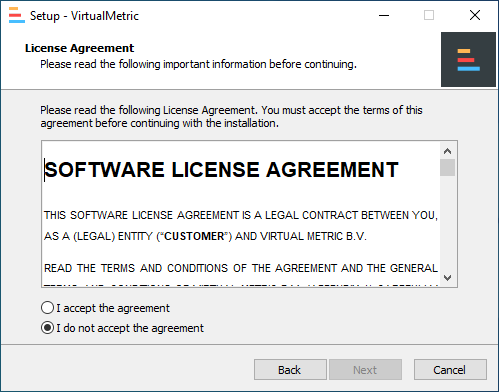
4\. The *License Agreement* page appears.

<div align="center"><figure><img src="https://3741708824-files.gitbook.io/~/files/v0/b/gitbook-x-prod.appspot.com/o/spaces%2FbhbshAPk7P4wdrLxisUn%2Fuploads%2Fgit-blob-5859ff4ad0409a914f0e02622239d2f45b01f13d%2FSetupWizard-Update-2.png?alt=media" alt=""><figcaption></figcaption></figure></div>

**Accept** the license agreement and click **Next**.

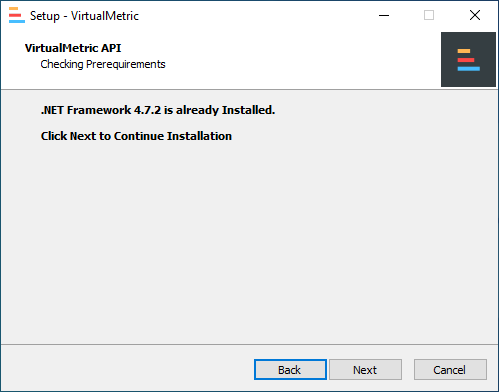
5\. The prerequisites check prompt page appears.

<div align="center"><figure><img src="https://3741708824-files.gitbook.io/~/files/v0/b/gitbook-x-prod.appspot.com/o/spaces%2FbhbshAPk7P4wdrLxisUn%2Fuploads%2Fgit-blob-2894ab714437c6114887b7d342ce6d54084f4da7%2FSetupWizard-Update-3.png?alt=media" alt=""><figcaption></figcaption></figure></div>

Click **Next** to continue.

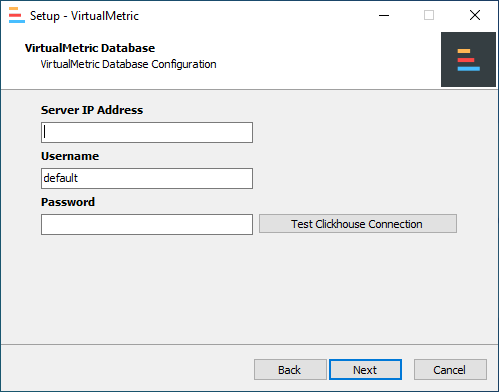
6\. In this step, you will configure the **VirtualMetric Database**.

<div align="center"><figure><img src="https://3741708824-files.gitbook.io/~/files/v0/b/gitbook-x-prod.appspot.com/o/spaces%2FbhbshAPk7P4wdrLxisUn%2Fuploads%2Fgit-blob-c104e8d3358b806bd9b6d5f06ee1bb181c865cb3%2FSetupWizard-Update-4.png?alt=media" alt=""><figcaption></figcaption></figure></div>

* Enter your Server IP Adress, and the your existing username and password.

<div align="center"><figure><img src="https://3741708824-files.gitbook.io/~/files/v0/b/gitbook-x-prod.appspot.com/o/spaces%2FbhbshAPk7P4wdrLxisUn%2Fuploads%2Fgit-blob-6980c0fdcb05d15c0900e76967bbb3be805b9b9b%2FSetupWizard-Update-5.png?alt=media" alt=""><figcaption></figcaption></figure></div>

* Check that the database connection works by clicking the **Test Clickhouse Connection** button. After the connection is verified, click **Next** to continue.

7\. Setup is now ready for the installation.

<div align="center"><figure><img src="https://3741708824-files.gitbook.io/~/files/v0/b/gitbook-x-prod.appspot.com/o/spaces%2FbhbshAPk7P4wdrLxisUn%2Fuploads%2Fgit-blob-01d520af7080d1c9cf00220a90affa6e794b41a6%2FSetupWizard-Update-6.png?alt=media" alt=""><figcaption></figcaption></figure></div>

Click the **Install** button to start the process.

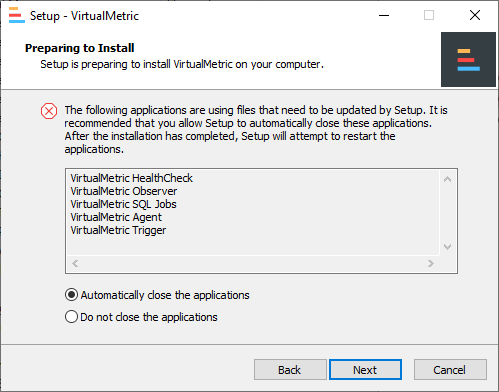
8\. On the next page, you may be warned that certain existing VirtualMetric components that need to be updated are running.

<div align="center"><figure><img src="https://3741708824-files.gitbook.io/~/files/v0/b/gitbook-x-prod.appspot.com/o/spaces%2FbhbshAPk7P4wdrLxisUn%2Fuploads%2Fgit-blob-b2899326b359aafcfca47e8ecc082ea1a2a8d18a%2FSetupWizard-Update-7.png?alt=media" alt=""><figcaption></figcaption></figure></div>

Allow *Setup* to **Automatically close the applications** (selected by default). Then click **Next**.

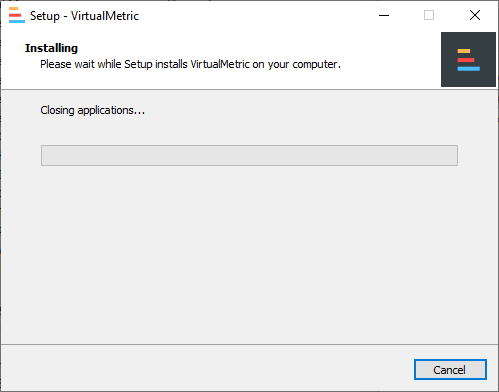
8\. The installation process will first close the running applications.

<div align="center"><figure><img src="https://3741708824-files.gitbook.io/~/files/v0/b/gitbook-x-prod.appspot.com/o/spaces%2FbhbshAPk7P4wdrLxisUn%2Fuploads%2Fgit-blob-ad8bb0a424418efeae5cc2b84a1338ffccc5948d%2FSetupWizard-Update-8.png?alt=media" alt=""><figcaption></figcaption></figure></div>

Then it will extract the files necessary for the update.

<div align="center"><figure><img src="https://3741708824-files.gitbook.io/~/files/v0/b/gitbook-x-prod.appspot.com/o/spaces%2FbhbshAPk7P4wdrLxisUn%2Fuploads%2Fgit-blob-aa426527954de0e6bbbc2f90ff9f8eab9b4510ce%2FSetupWizard-Update-9.png?alt=media" alt=""><figcaption></figcaption></figure></div>

9\. Wait for the installation process to complete.

<div align="center"><figure><img src="https://3741708824-files.gitbook.io/~/files/v0/b/gitbook-x-prod.appspot.com/o/spaces%2FbhbshAPk7P4wdrLxisUn%2Fuploads%2Fgit-blob-33377323bd01eca19af6c9c81c3f573c812c18ce%2FSetupWizard-Update-10.png?alt=media" alt=""><figcaption></figcaption></figure></div>

10\. The final page of the wizard appears.

<div align="center"><figure><img src="https://3741708824-files.gitbook.io/~/files/v0/b/gitbook-x-prod.appspot.com/o/spaces%2FbhbshAPk7P4wdrLxisUn%2Fuploads%2Fgit-blob-8b8448dcd60716b356a6cd558da964689347fd8a%2FSetupWizard-Update-11.png?alt=media" alt=""><figcaption></figcaption></figure></div>

Click **Finish** to exit.

*VirtualMetric* is updated now, and you can log in through the web interface.
